Small nail or screw holes
Usually filled, sanded, primed and painted when the surrounding drywall remains stable.

DIY Drywall Help
Drywall repair gets easier when you identify what failed, choose the right material and follow the correct sequence. This page explains the practical basics without pretending every repair is the same.
Start Here

Start by identifying the kind of damage you are dealing with. A small nail hole, a doorknob impact, a loose tape seam and a larger cutout may all look like drywall damage, but they require different repairs.
Usually filled, sanded, primed and painted when the surrounding drywall remains stable.
May need a reinforced patch rather than compound applied directly over the opening.
Can indicate movement, poor previous finishing or a failed joint that needs tape and compound.
The failed tape usually needs to be removed before the seam is reinforced and rebuilt.
New compound does not permanently fix released tape, crumbling gypsum, moisture damage or movement. Unstable material must be removed or corrected before the repair is rebuilt.
Choose the Right Material
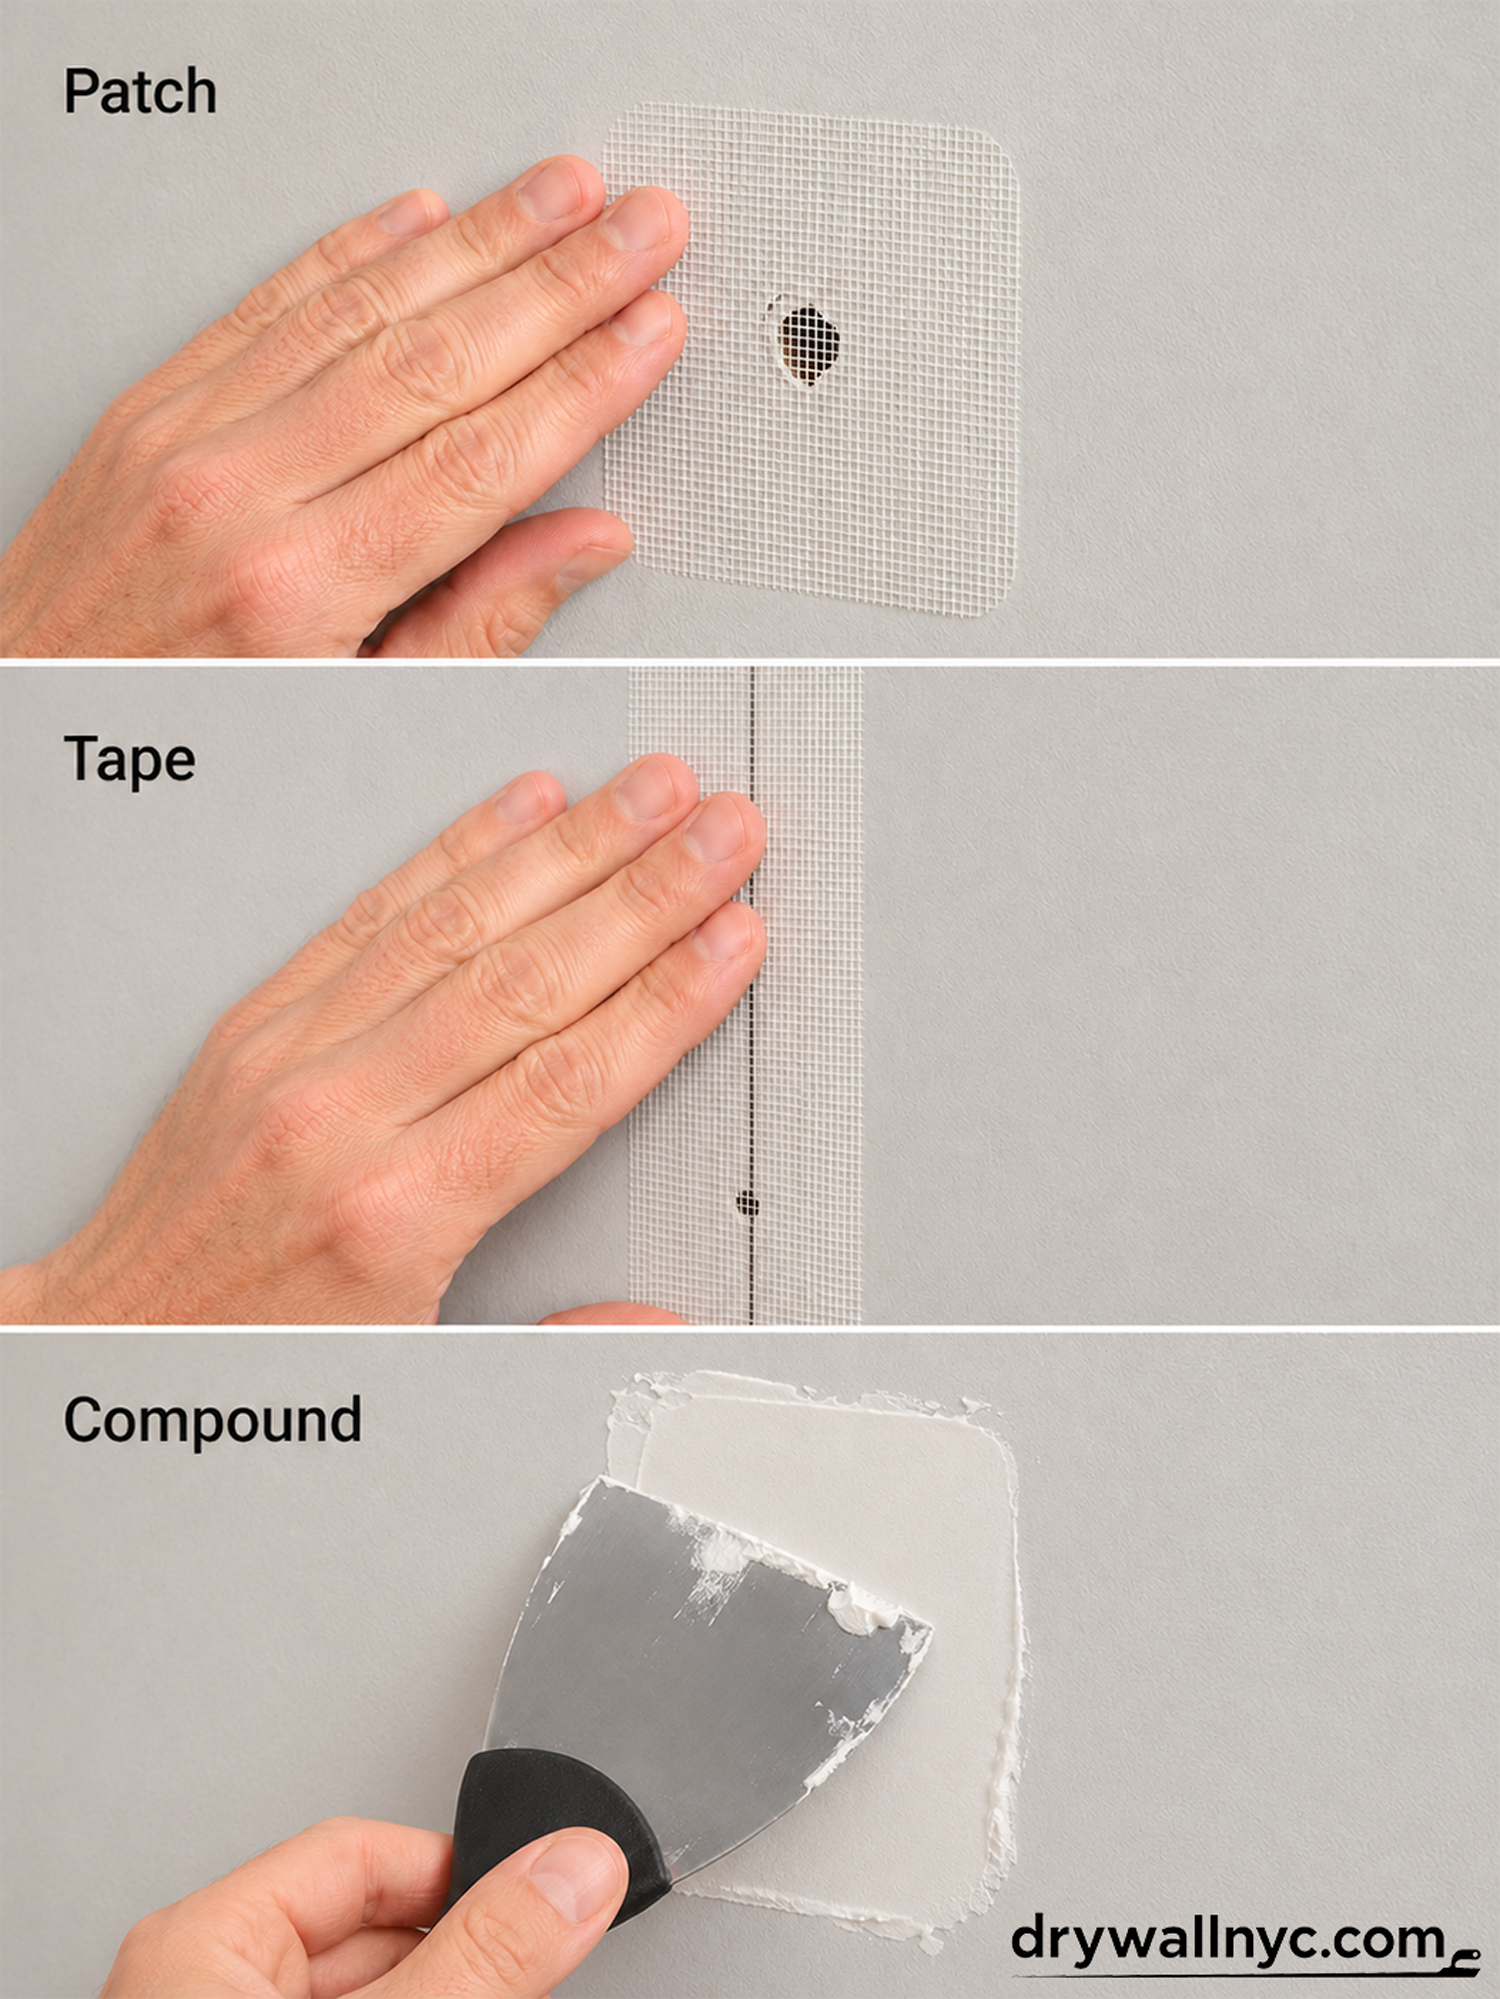
| Material | What it does | Common use |
|---|---|---|
| Repair patch | Bridges a small opening and provides a surface for compound. | Small stable holes and localized damage. |
| Mesh tape | Reinforces a joint or repair and is easy to position. | Repairs paired with setting-type compound. |
| Paper tape | Creates a strong joint when embedded correctly in wet compound. | Flat joints, inside corners and standard finishing. |
| Setting-type compound | Hardens chemically and is useful for rebuilding and deeper filling. | Mesh tape, deeper repairs and first coats. |
| Finishing compound | Spreads and sands more easily for wider feathered finish coats. | Final coats and paint-ready smoothing. |
The product itself does not create a good repair. Surface preparation, coat width, drying time and sanding matter just as much.
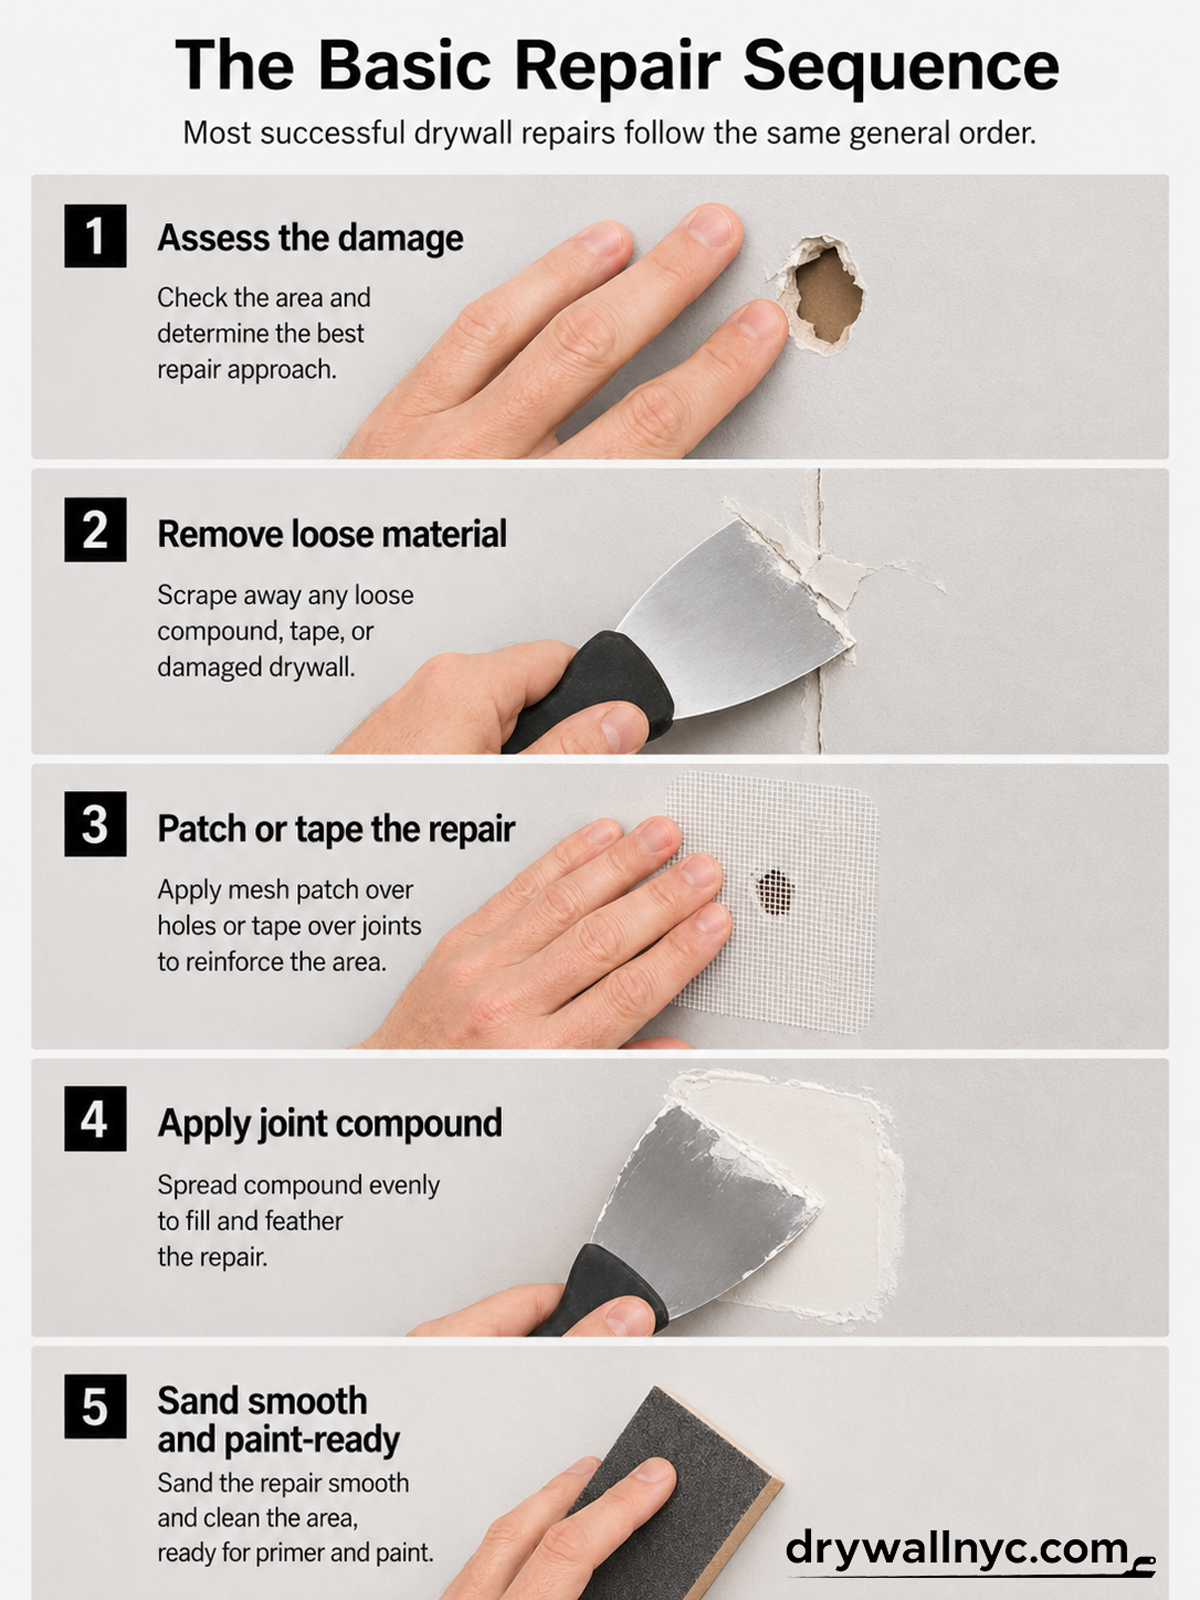
The Basic Repair Sequence
Common DIY Mistakes
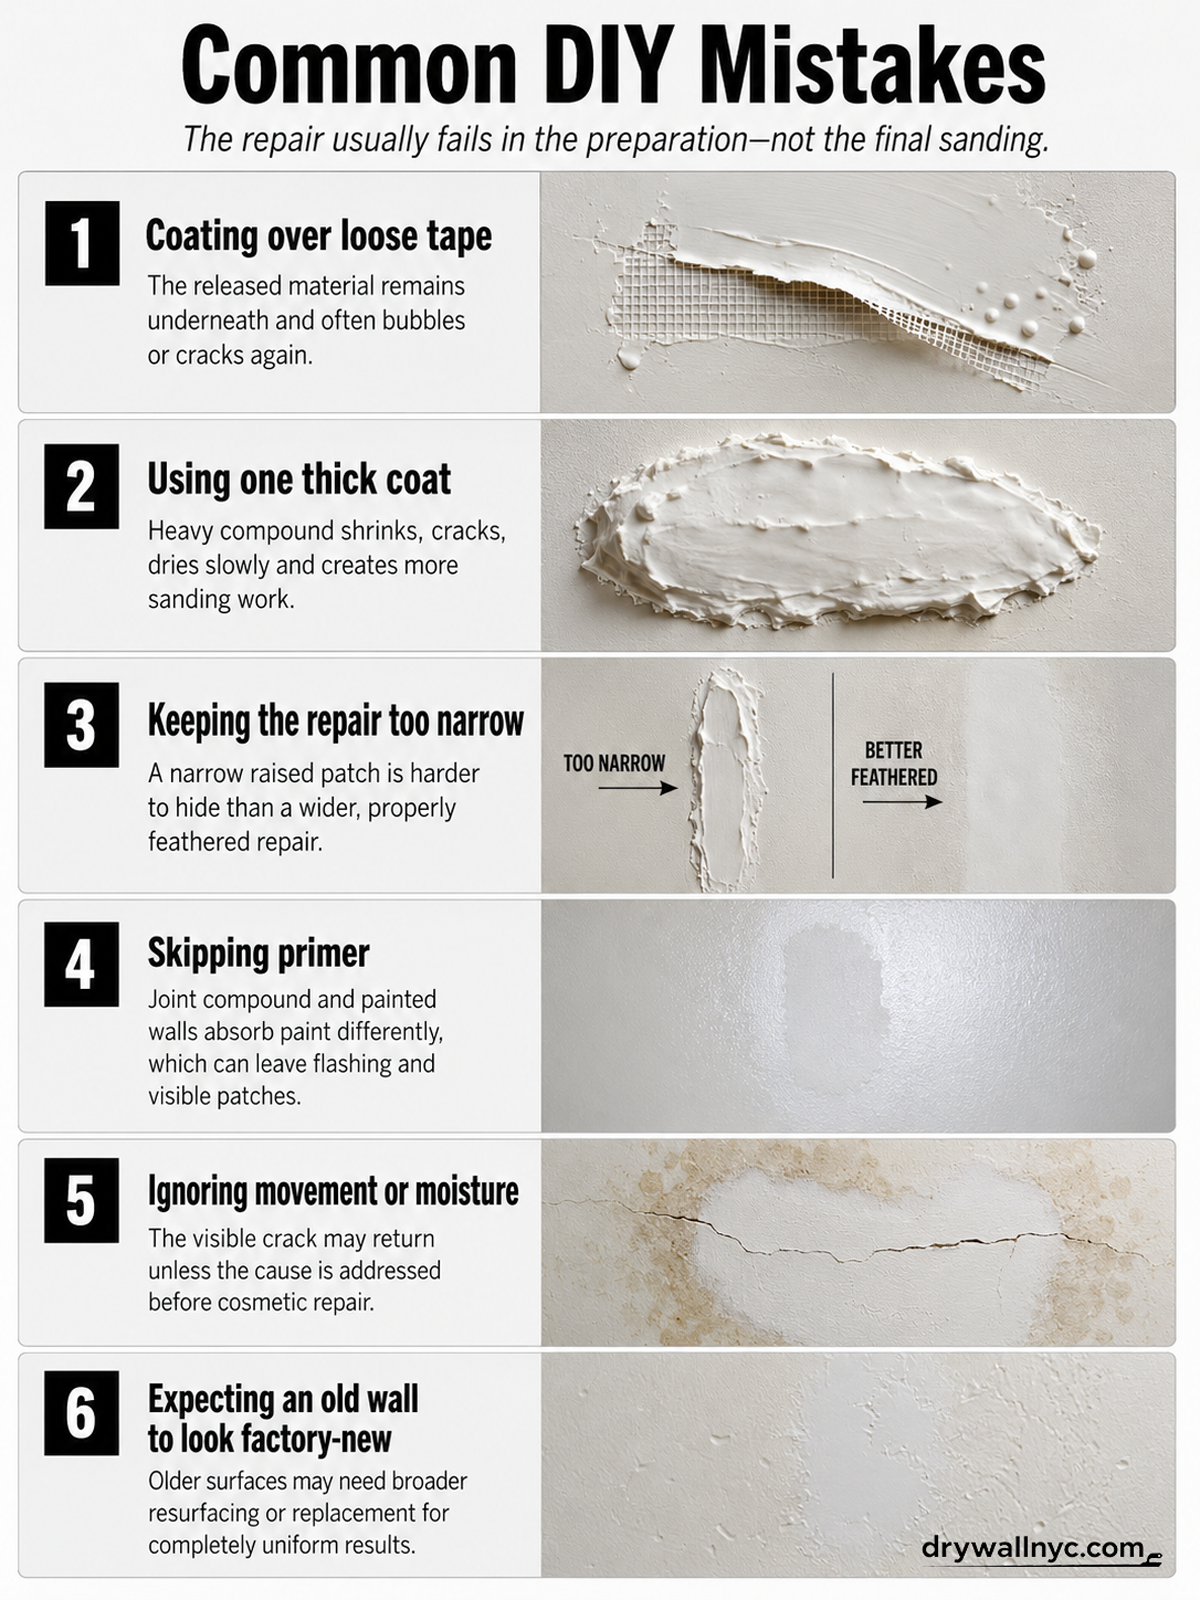
The released material remains underneath and often bubbles or cracks again.
Heavy compound shrinks, cracks, dries slowly and creates more sanding work.
A narrow raised patch is harder to hide than a wider, properly feathered repair.
Joint compound and painted walls absorb paint differently, which can leave flashing and visible patches.
The visible crack may return unless the cause is addressed before cosmetic repair.
Older surfaces may need broader resurfacing or replacement for completely uniform results.
When to Stop
Consider professional help when the repair involves a large opening, repeated cracking, loose ceiling tape, multiple failed seams, uncertain backing, moisture damage, occupied-space protection or a finish that must blend cleanly across a highly visible wall or ceiling.
Older apartments and lofts can contain previous repairs, plaster transitions, framing movement and multiple layers of paint. Broader resurfacing may be needed for a completely uniform new-wall appearance.
DrywallNYC.com provides repair, taping and paint-ready finishing for apartments and lofts in New York City.